

MICROMETER HEAVEN
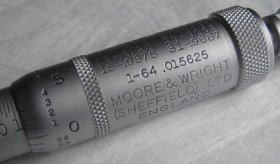 I used to sit for hours flicking back and forth through the glossy pages, gazing at the full colour photographs of the stunning models in all their glory.
This was the micrometer section of the Buck and Hickman catalogue of course!
There's something about micrometers; their precision and accuracy (for an explanation of the difference between precision and accuracy, see Wikipedia), clean lines, smooth operation and pearl chrome finish that makes them objects of desire. Surely, even those without an engineering background might be able to appreciate them, wonder at their internal workings and perhaps make a measurement. As a youth I would spend almost all my pocket money on tools, gauges, specialist spanners and so on.
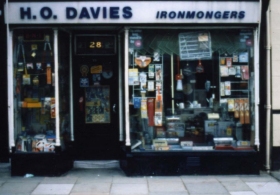
My usual haunts were H.O. Davies and Clement O. Hughes, both in Rhyl and both closed, sadly. H.O.Davies's shop was absolutely packed with all sorts of tools and ironmongery: everything you could imagine and even things you couldn't. It had that distinctive smell of linseed oil and paraffin, reminiscent of all genuine ironmongers of the time. The floor was covered in boxes, gradually spreading out from the bottom of the shelves that lined each wall. Deliveries remained where they were placed until needed. The lighting was a single dusty fluorescent fitting that failed to project any light into the most remote corners.
You couldn't find anything yourself but Garth (the son of the owner) knew exactly where everything was, be it a ½" Whit coach bolt with a choice of hexagonal or square nut, an 18" hook and band hinge or a 1¼" brass bath plug. Garth's mother (the owner) was usually sat on a stool in one of the gloomier corners, mug of tea in one hand and a forgotten cigarette with a long piece of drooping ash in the other. Most of the items in the shop were still priced in shillings and pence even though decimalisation had occurred some years earlier and, as a result, I managed to buy most items at the old price.
The window display hadn't changed in years, probably due to it being now inaccessible from inside the shop. The cardboard boxes had been faded by the sun years ago so it was difficult to tell what they contained. Even coloured plastic items had been bleached to a pale grey.

Hughes's on the other hand was spotlessly clean and dazzlingly bright with everything in its proper place on shelves, on hooks or on racks. As I recall, they used to have a very nice display of Bedford chrome-plated open-ended spanners that went as small as 12BA.
I don't use micrometers much these days but I do like collecting them. The variety of styles and purpose-built models all add to the wonder. I tend to buy micrometers on Ebay, where you can find some amazing deals if you bide your time. However, it's disappointing to find so many micrometers without their spanner, setting disc or bars, etc. And people who engrave their initials on the frame! I understand why but in my mind it is sacrilege and I avoid these if at all possible. Below, I have shown a selection of the micrometers in my collection. Enjoy.
RECENT ADDITIONS - Mitutoyo Micrometer Head
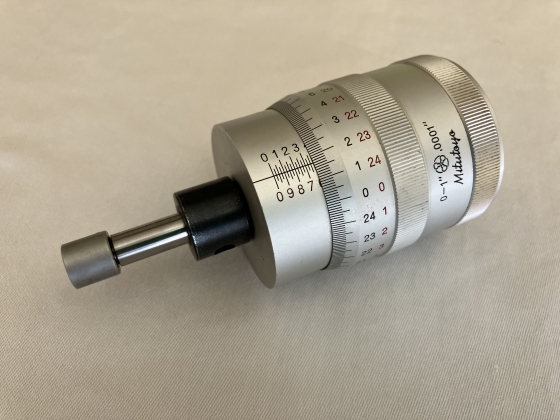 I paid £5 for this Mitutoyo 152-392 micrometer head at the 2024 Astle Park Rally.
It is apparently ex-MoD, has bidirectional graduations (reverse scale in red) and is from some type of XY plane measuring instrument. It's in excellent condition with no scuffs,
tightness or dings. New ones retail for about £230. Link to the Mitutoyo micrometer head
catalogue.
W Fox Micrometer
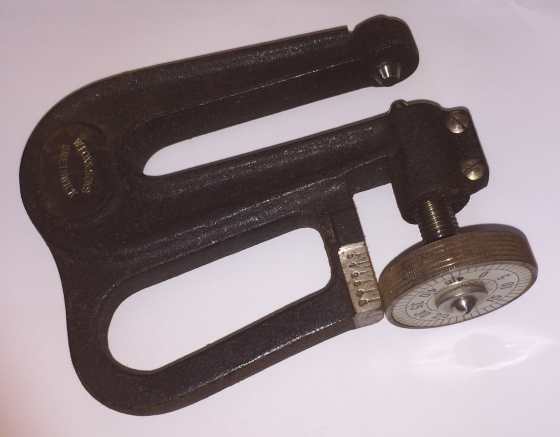 I received this micrometer as a gift. It's essentially a deep throat micrometer intended for measuring sheet material at up to about 7cm
from the edge and up to ½" thick. The micrometer is Imperial and graduated in 1000ths. It has a dial rather than the usual thimble
and the fixed anvil is adjustable with a screw and locknut. W Fox made
other dial-type micrometers, one with a smaller throat size and another similar to that shown here but with an alternative way of holding it.
This micrometer appears to
be of 1940s origin but there is very little information about the company except that it had premises at Brewery Street in Smethwick and
Birchfield Lane in Oldbury.
M&W 964B Micrometer
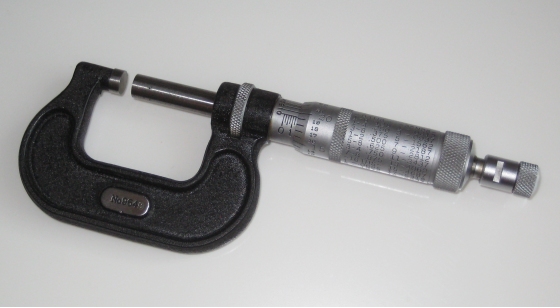 I had an Ebay search saved and this M&W 964B came up as a Buy It Now item. It's in very good condition
and is a later model than the one I purchased recently as it has a spring-lid case rather than the wooden box. It is complete
with setting spanner, conversion chart and outer cardboard box.
Mitutoyo model 123-125 0-1" Gear Tooth Micrometer
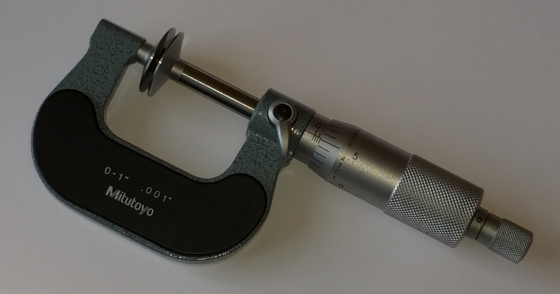 This square frame 0-1" micrometer was given to me recently. It had been bought for a project, hardly used and then found its way
to me via two family members. It has 20mm diameter disc anvils with 8mm diameter recesses in the centre and would typically be
used for measuring soft materials and shrouded features such as gear teeth. Gear tooth thickness can be measured using the
"span" method and is explained
here
in section 5.2.
M&W 964B Micrometer
 This square frame 0-1" micrometer came from a seller on Ebay. The micrometer designation "B" means it has a vernier
scale so that it can read down to 1/10,000". It has the usual fraction-to-decimal conversion on the thimble and
a smoothly working ratchet. The "B" suffix looks like it was an afterthought since the stamp is much lighter than the
"No 964".
I couldn't find a square-framed micrometer in the latest M&W catalogue so perhaps these are no longer made in the 196X range.
M&W 967, 969, 970 and 972 Micrometers
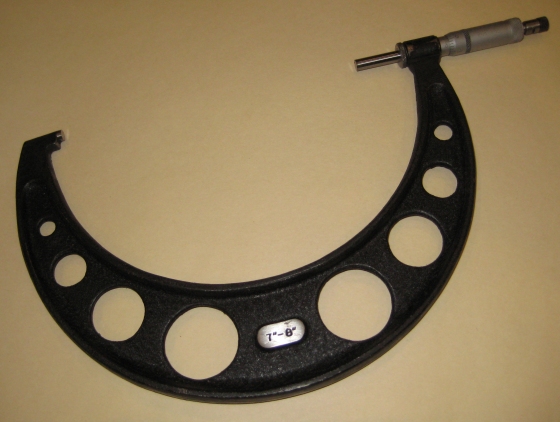 I purchased four micrometers from a seller on Ebay - the 7"-8" is shown here.
The 2"-3" one is in very well-used condition but not damaged; the rest are in
good condition and undamaged - minor scuffs on the paint but nothing serious and no engraved names!
Some have spanners and setting bars and all have wooden boxes. A feint engraving on one of the setting bars states
"15/5/57 ACCURATE" so I presume the micrometer is of the same era.
The advert stated free 1st class Royal Mail but the sender sent it by Hermes. It swirled around in the Hermes network for nearly six weeks before being sent back to the sender who then reposted it using ParcelForce. The micrometers eventually arrived over seven weeks after the auction ended.
M&W 961B 0-1" Vernier
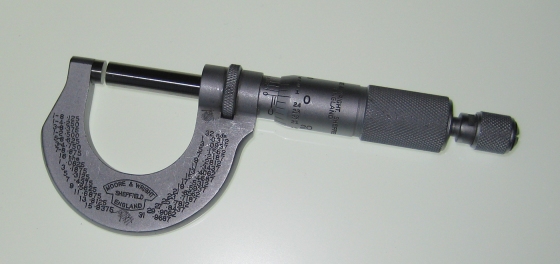 I already had an M&W 961B Imperial 0-1" Vernier micrometer, bought as part of a job lot, but it had had a busy life and was bit battered and very tight.
I dismantled and cleaned
it and it was now in much better shape, kept in a drawer and used occasionally.
More recently a better example appeared on Ebay and I bought that for my collection. There's nothing particularly unusual about the 961B, except that the "B" means it has a Vernier scale for increased resolution down to 0.0001". It's broadly similar to, and predecessor of, the 1961B but has the ⅛ths, 1⁄16ths and 1⁄32nds and their decimal equivalents engraved on the yolk. This one had been well used but looked after. Unfortunately, it had a couple of engravings on it that had then been crossed out by re-engraving - heathens!
M&W K17 Anglometric 1-2" and 25-50mm Micrometer
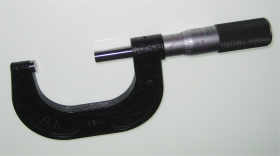 A recent acquisition was the M&W K51 Anglometric (combined Imperial and Metric) 1-2" and 25-50mm micrometer. This was bought new in 1975 by the person I bought it from
(apparently).
It has a black Imperial scale on the sleeve and a corresponding scale in thousandths on the thimble
and a helical red metric scale on the sleeve and a corresponding set of red numbers on the thimble.
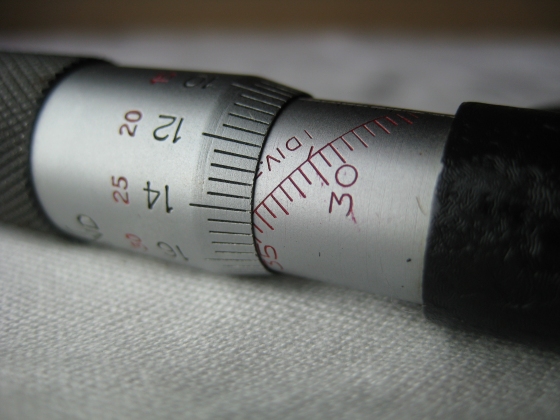
An interesting feature is that, while standard Imperial micrometers have minor graduations on the sleeve in 25 thousandths, this model has graduations in 20 thousandths, so the screw pitch is 50 TPI, which better suits its metric capability.
It is an unusual micrometer and not something I have seen before, though Ambrose Shardlow of Sheffield did make a version of their own. A comment on Practical Machinist suggests that Shardlow made them for Regal Beloit, an engineering and tool-making company in the USA.
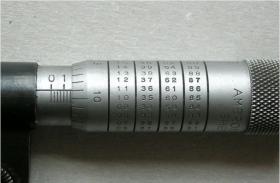 Incidently, Shardlow
made a useful Imperial "Check Reading" micrometer that helpfully had the thimble reading plus additional multiples of 25 thousandths engraved on it. This could help to
avoid mis-reading a dimension at a time of lapsed concentration.
Shardlow was taken over by GKN in 1963 and the business closed in 1983.
M&W 975.5T 1⁄16" to ¾" Vee Micrometer
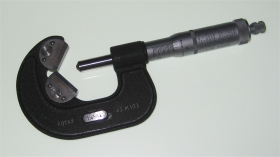 This vee micrometer is used to measure the effective diameter of taps, milling cutters and other tools with an odd number of flutes. A calculation is required
to establish the final diameter and this document explains how to do this.
The anvils are faced with tungsten carbide to mitigate wear from contact with hardened cutters.
This micrometer has the M&W number on the rear and ROTAX 43 M103 on the front. Rotax
is an Austrian company that develops and manufactures innovative
internal combustion engines for power sports (water sports, motorcycles, light aircraft, etc.), so perhaps it
was from one of their factories.
John Hall Tools (Rugby) Ltd. 1"-2" Limit Micrometer
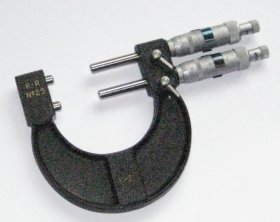 A rare R-R No 25 limit micrometer from John Hall Tools (Rugby) Ltd. with imperial Moore and Wright micrometer heads. It's in mint condition and
comes with its own wooden box.
Limit micrometers are used in place of fixed dimension GO/NoGo gauges with the micrometers set to the upper and lower limits and locked in place.
If the part to be checked will pass between the lower dimension anvils it is too small; if it does not pass between the upper dimension anvils it is too large. This particular model has chamfered anvils to make the workpiece easier to insert between them.
John Hall (Tools) Ltd. was established in Bristol in 1894 and has an interesting history. The company expanded by buying and developing existing small businesses; the Rugby premises were bought in 1947 but struggled to survive and the business was transferred to Leicester. Inside the box lid is a label stating the business address as 158 Humberstone Road, Leicester. From Google Maps this looks like the original buildings have been cleared and it is now a main office for Shoe Zone Retail Ltd.
Mitutoyo make a similar micrometer, the Series 113 in 0-25mm and 25-50mm versions.
M&W 916 ½" Tube Micrometer
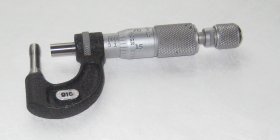 Used more or less exclusively for measuring the wall thickness of tubes and pipes, the radial thickness of hollow items such as washers or
the distance from a drilled hole to the edge of a component. Have a look
here for an explanation of the important difference between tube and pipe.
M&W 933P ⅜" Pocket Micrometer with large anvils
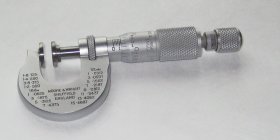 Probably used by an inspector to check the diameter of stock materials or components. The large anvils would tend to be required for soft materials such
as plastic, fabric or round wire, and sheet materials such as paper, card, etc. The yolk has the fractional inch to decimal inch conversions engraved
on it.
M&W 965M 25mm Standard Micrometer
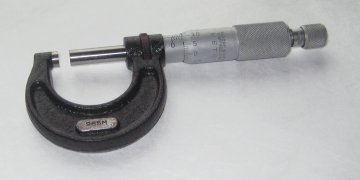 A general purpose micrometer used in conjunction with machine tools, for inspection purposes or for ad hoc measurements.
I had been given this as a present back in the mid-1970s, so it's probably around 45 years old. I don't use it much and it is complete with its plastic conversion tables card, spanner, metal case and all in the original cardboard box.
M&W 936 8" Deep Frame Micrometer with large anvils
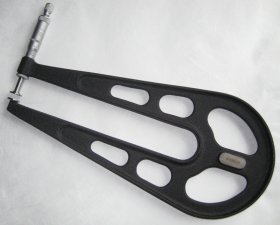 Typically used to measure sheet material at up to 8" from the edge. With rolled metal sheet it's important to measure some distance in from the
edge to avoid the oxide film or scale, variations in thickness and other distortion that may be present along the edge.
I checked to see if these were still being made by M&W but I couldn't find any in their online catalogue. There are still NOS ones (new old stock) available from some suppliers.
I bought this on Ebay for the amazingly low price of £8 - I think postage was more than that. I had seen a number of these for sale from different sellers and the prices went up to about £60. I bided my time and waited until demand had waned then bought this immaculate example in its wooden box.
M&W 968 3-4" Standard Micrometer
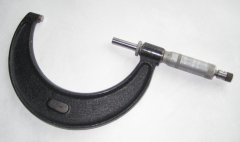 Basic micrometer used for measuring distances between 3 and 4 inches. The micrometer needs to be zeroed using a 3" setting bar. It had its own wooden box but the
setting bar is missing.
M&W Bench Micrometer
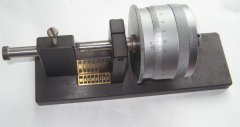 High precision micrometer head for repetitive work, for example, checking samples of machined components. There's an adjustable anvil on the left
and the 60mm diameter thimble can read to 0.002mm.